Accurately identifying and documenting common pipeline defects is crucial for municipal workers, contractors, and inspection teams. Even minor issues can escalate into costly failures if left unaddressed. This comprehensive guide offers practical, field-ready strategies that convert raw inspection data into clear, actionable maintenance plans—helping you protect your infrastructure and work toward long-term reliability.
Why Accurate Defect Recognition Matters
Visual observation is only the starting point. Inspection footage and sensor data must be interpreted in context—pipe material, joint type, location in the line, flow conditions, and surrounding environment all affect what a “defect” actually means. Two cracks that look similar on camera may represent very different risks depending on position, length, and whether there are related signs like staining, deformation, or infiltration.
Misidentification Typically Happens in Two Ways
- False positives (over-calling defects): Shadows, debris, mineral deposits, or camera artifacts can appear like cracks or voids. This can trigger unnecessary repairs, unplanned downtime, and budget waste.
- False negatives (missing real defects): Small corrosion, hairline cracks, or early infiltration can be overlooked—allowing damage to progress into leaks, structural failure, sinkholes, or service disruptions.
To Improve Accuracy, Inspection Teams Should
- Confirm defects using multiple cues (visual indicators, location, repeatable measurements).
- Use verification tools when visibility is limited (e.g., sonar/laser profiling where appropriate).
- Apply consistent coding and severity criteria so findings translate into reliable rehab decisions.
Inspection Workflow That Improves Defect Accuracy: Step-by-Step
A consistent workflow reduces missed defects, improves documentation quality, and creates clearer handoffs to maintenance and rehab planning.
Step 1: Pre-Inspection Preparation
- Review maps, pipe size/material, known trouble spots, and past inspection history.
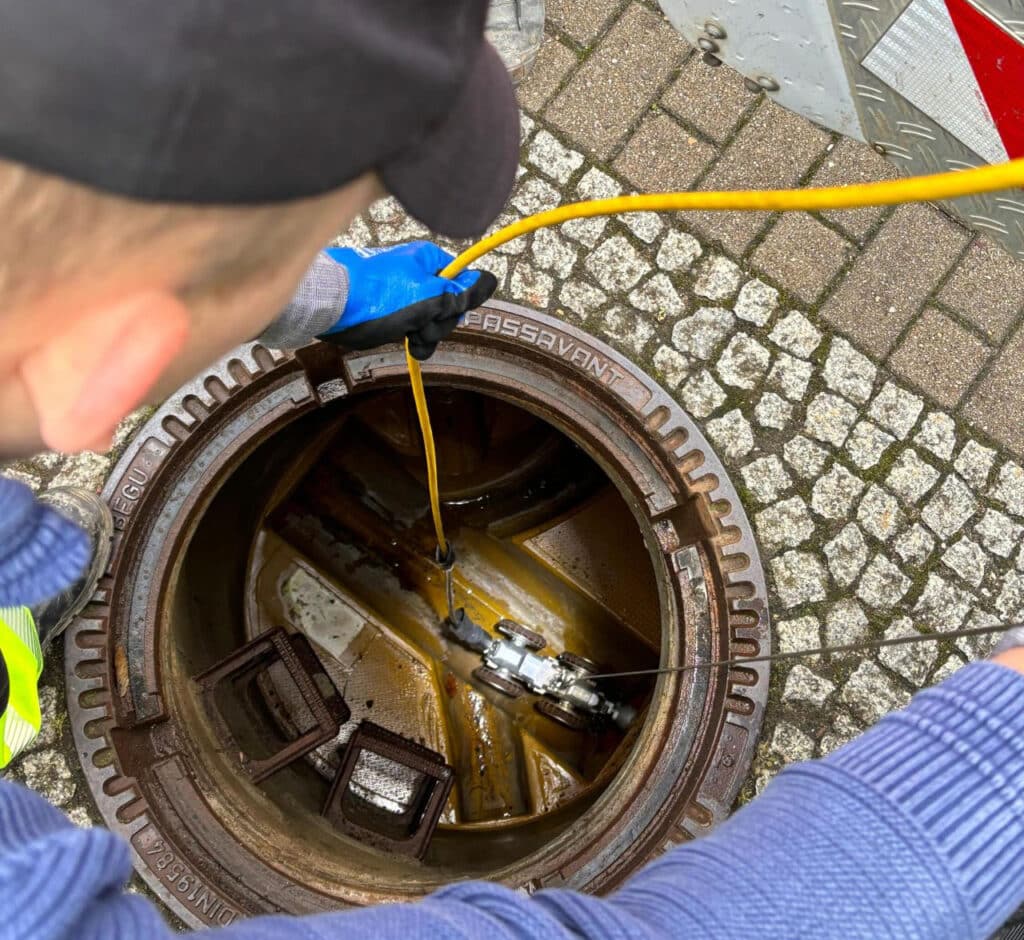
- Confirm equipment readiness (CCTV camera condition, lighting, lens cleanliness, distance counter calibration).
- Plan access, bypass/pumping needs (if applicable), and traffic control.
Step 2: Cleaning and Visibility Preparation: Prevents “Hidden Defects”
Many identification errors come from poor visibility rather than poor judgment.
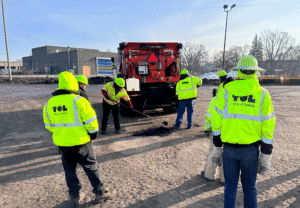
- Debris & grease: Can hide cracks, infiltration points, and joint separation. Use appropriate cleaning (e.g., hydro-jetting, combination sewer cleaning trucks) before final inspection.
- Mineral scale/deposits: Can mask corrosion pits and small fractures. Document scale severity and consider follow-up inspection after additional cleaning if needed.
Step 3: Initial Reconnaissance Pass: Fast Risk Screen
- Identify major obstructions, collapses, severe offsets, or active infiltration.
- Flag segments requiring slower, higher-detail scanning.
Step 4: Detailed Inspection Pass: Controlled Capture
- Maintain steady speed and consistent camera centering.
- Lighting/camera issues such as insufficient light, dirty lenses, condensation, or glare can create false positives/negatives. Stop and clean/adjust as needed.
- Capture stills/video at each defect and at key reference points.
Step 5: Flow and Environmental Considerations: When the Pipe “Lies”
- High flow/stagnation can blur details or hide invert conditions. If possible, schedule under more stable conditions, or use sonar profiling where CCTV is limited.
- External influences (soil movement / nearby construction) can change joint alignment or create deformation—document context carefully.
Step 6: Interpretation and Classification
- Classify findings using a standardized system (see documentation section).
- Use verification tools when footage is ambiguous (e.g., laser profiling for geometry; sonar for submerged pipe).
Step 7: Reporting and Action Planning
- Produce clear defect logs with consistent codes, locations, severity ratings, and recommended next steps (monitor, clean, verify, repair, rehab).
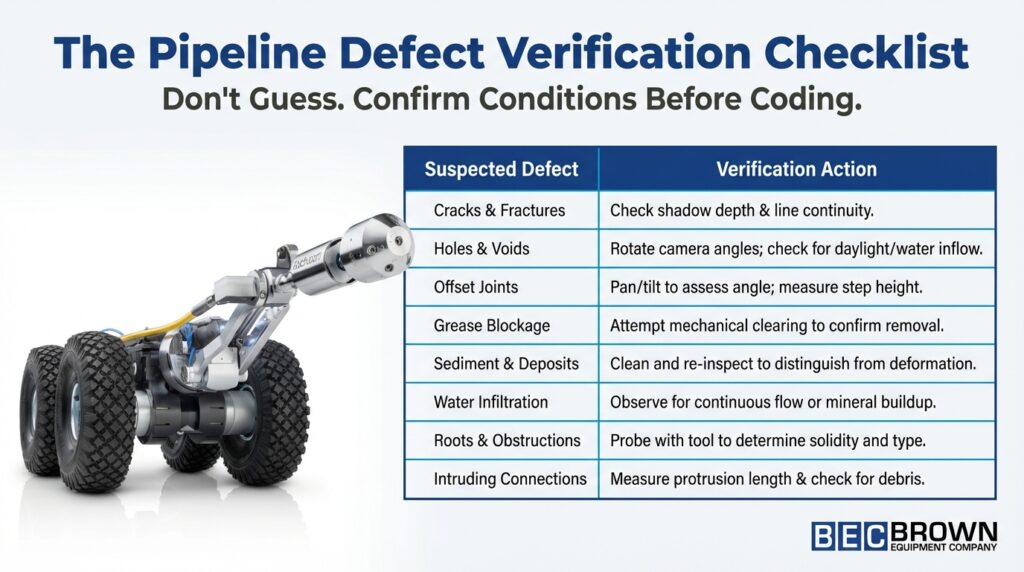
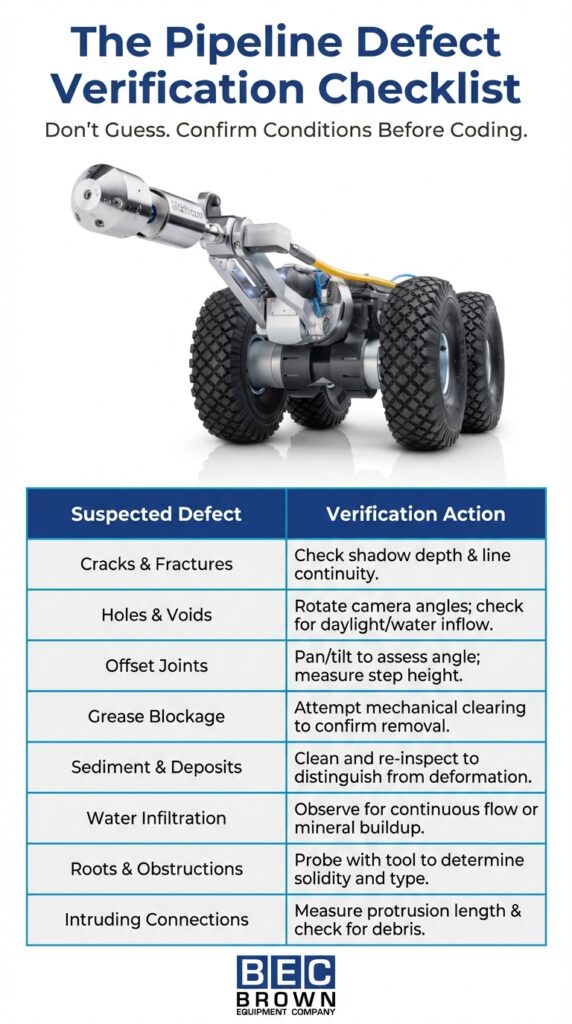
Field Identification Tips by Defect Category: How to Confirm What You’re Seeing
Below are practical confirmation cues for the defect types—especially helpful when conditions like debris, mineral scale, poor lighting, or unusual flow make footage misleading. Use these field tips to improve accuracy and reduce misidentification:
1. Structural – Cracks/Fractures
What It Looks Like
Fine lines, offsets, or fissures along the pipe wall. May run longitudinally (along the length) or circumferentially (around the pipe).
What It’s Commonly Confused With
- Camera lens scratches
- Pipe seams or gaskets
- Mineral deposits or stains
How To Confirm
- Check if the line remains consistent across multiple frames and camera positions.
- Look for depth, shadow, or offset (not just a surface mark).
- Use laser profiling, if available, to detect deformation at the defect location.
What To Document
- Location (distance/clock position), length, orientation (longitudinal/circumferential), severity, and supporting images/video.
2. Structural – Holes/Voids
What It Looks Like
Circular or irregular openings in the pipe wall, sometimes with jagged edges or surrounding material loss.
What It’s Commonly Confused With
- Deposits that have detached
- Shadows from camera angle
- Foreign objects stuck to the wall
How To Confirm
- Rotate camera to view from multiple angles.
- If possible, use sonar or laser to confirm wall loss.
- Check for water infiltration or daylight visible through the hole.
What To Document
- Exact location, size/shape, depth, visible causes (corrosion, roots, etc.), and flow through the void if present.
3. Operational – Grease Blockage
What It Looks Like
Thick, waxy, usually pale or yellowish deposits narrowing or coating the pipe interior.
What It’s Commonly Confused With
- Mineral scaling
- Stagnant sediment
- Camera glare
How To Confirm
- Attempt mechanical cleaning to see if deposit is removed.
- Probe with jetter or other tool if safe.
What To Document
- Extent (length, % of circumference blocked), thickness, location, and before/after cleaning images.
4. Operational – Sediment/Deposits
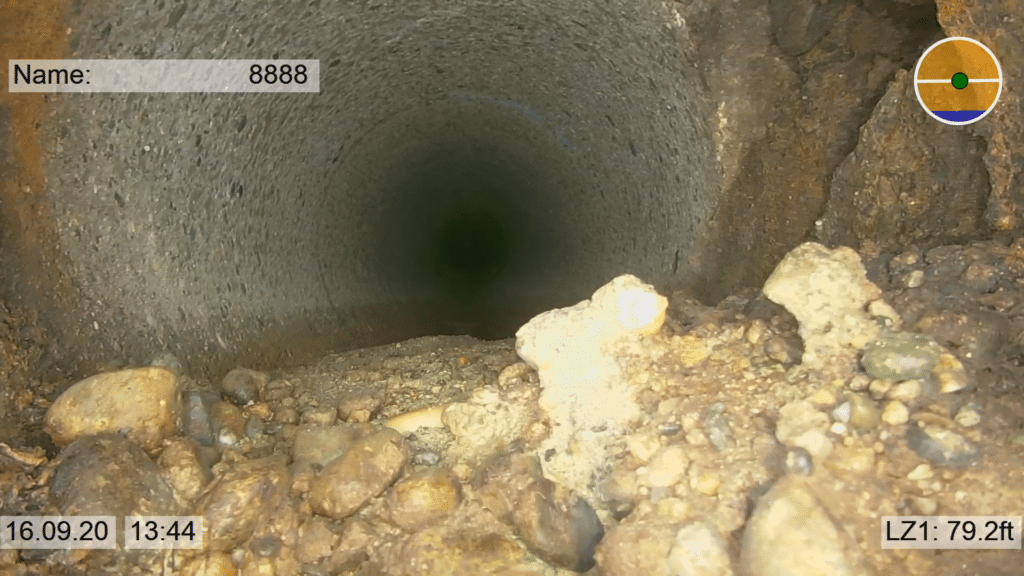
What It Looks Like
Layers of mud, silt, sand, or scale settled on the invert (bottom) of the pipe; can appear as uneven mounds or sheets.
What It’s Commonly Confused With
- Structural deformation (if sediment is thick)
- Mineral scaling
- Low-flow water lines
How To Confirm
- Observe changes after cleaning/jetting.
- Use CCTV in both directions to verify it’s not an optical illusion.
What To Document
- Depth and coverage, location, composition (if visible), and any underlying pipe condition after removal.
5. Construction – Offset Joints
What It Looks Like
Visible misalignment between two pipe sections; step or gap at the joint.
What It’s Commonly Confused With
- Camera tilt or distortion
- Debris at a joint
- Minor joint gap (normal in some materials)
How To Confirm
- Pan/tilt camera to assess the true offset.
- Use laser profiling, if available, for measurement.
- Check for associated infiltration or structural distress.
What To Document
- Degree of offset (vertical/horizontal), location, presence of leaks, and any resulting flow obstruction.
6. Infiltration – Water Seepage
What It Looks Like
Dripping, staining, mineral streaks, or wet patches inside the pipe—often at joints or cracks.
What It’s Commonly Confused With
- Residual cleaning water
- Condensation
- Minor surface discoloration
How To Confirm
- Observe if water flow is continuous or only present under certain flow conditions.
- Look for mineral deposits at the entry point (indicates ongoing infiltration).
- Use flow monitoring or sonar to verify active inflow.
What To Document
- Source point, rate/severity, associated structural defects, and photo/video evidence of active seepage.
7. Blockages and Additional Obstructions (e.g., Roots, Foreign Objects, Collapsed Pipe)
What It Looks Like
Irregular blockages partially or fully obstructing flow—may be stringy (roots), solid (foreign objects), or collapsed pipe wall.
What It’s Commonly Confused With
- Large debris piles (may be mistaken for collapse)
- Camera tether or cable
- Temporary, mobile debris
How To Confirm
- Attempt to clear with jetting or mechanical tool.
- Observe blockage from multiple angles to confirm type.
- For suspected collapse, look for deformation or pipe material protruding into the flow path.
What To Document
- Type of obstruction, location, extent of blockage (% flow lost), and results of attempted removal.
8. Joints and Alignment Defects (Open/Offset Joints, Intruding Connections)
What It Looks Like
Gaps, misalignments, or visible protrusions at pipe joints; service connections sticking into the mainline.
What It’s Commonly Confused With
- Normal joint gap (depending on material/spec)
- Debris at joint
- Camera misalignment
How To Confirm
- Use camera pan/tilt to inspect from multiple perspectives.
- Measure degree of offset or protrusion.
- Check for associated infiltration or debris accumulation.
What To Document
- Type of joint defect, exact location, measurement of gap/offset/intrusion, and any related flow or infiltration issues.
By using these focused confirmation tips at each step, inspection teams can reduce misidentification, ensure consistent severity scoring, and produce field documentation that supports accurate, actionable rehabilitation planning.
Inspection Technologies: Core Tools vs. Emerging Advances
No single tool can confirm every defect in every pipe condition. By pairing today’s proven inspection methods with newer innovations, teams can capture clearer evidence, verify questionable findings, and reduce missed issues.
Core Technologies Used Today
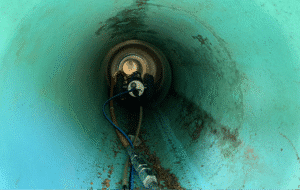
- CCTV inspection: Best for visual confirmation of cracks, joint defects, roots, grease, debris, and many infiltration indicators.
- Laser profiling: Captures pipe geometry, ovality, deformation, and precise measurements for offsets and structural changes.
- Sonar profiling: Useful when the pipe is partially or fully submerged and CCTV can’t see the invert clearly.
- Nondestructive testing (NDT): Helps assess wall loss, material thickness, or hidden corrosion when visual-only inspection isn’t enough.
- Centralized data systems: Combine observations, images, and measurements into consistent logs for planning and trend analysis.
Emerging Advances
- AI/ML-assisted review: Can speed up defect flagging and reduce reviewer fatigue, but still requires human QA/QC.
- Smart pigging (where applicable): High-resolution sensor data for long segments; especially useful for pipelines where tool access is feasible.
- Augmented inspection tools: Wearables, multi-view cameras, and real-time sensor overlays can improve capture consistency and training.
Severity, Prioritization, and Decision Thresholds
Not every defect requires the same response. A simple, consistent severity framework helps teams decide what to address immediately, what to schedule, and what to monitor—so time and budget go where risk is highest.
Repair / Mitigate Immediately (High Risk)
- Evidence of collapse or near-collapse
- Rapid/active infiltration at critical joints or cracks
- Major voids/holes, severe deformation, or large offsets restricting flow
- Obstructions causing backups or confirmed capacity loss
Schedule Rehab / Targeted Repair (Medium Risk)
- Progressive cracking, joint separation, recurring infiltration indicators
- Moderate offsets, repeated operational blockages, early deformation trends
- Defects that are stable today but likely to worsen before the next cycle
Monitor / Reinspect (Lower Risk Or Uncertain)
- Minor surface anomalies with no deformation/infiltration evidence
- Deposits/scale that require cleaning and re-check before calling a defect
- One-off operational issues addressed by cleaning (verify after)
Documentation, Coding, and QA/QC
Standardized documentation is what turns inspection footage into actionable rehab scopes, compliant reports, and reliable long-term trends. To reduce rework and improve decision-making, use a consistent approach across crews, contractors, and review teams.
Use recognized coding standards (or your municipality’s required system) Many agencies require established defect coding systems—such as NASSCO PACP (common in North America) or equivalent regional standards. Aligning to a standard improves consistency across years and across reviewers.
Minimum Documentation Elements
For each defect, capture:
- Exact location (distance counter and upstream/downstream reference)
- Clock position and pipe segment reference (when applicable)
- Defect code/category and severity rating
- Still image and video clip
- Notes on inspection conditions (flow level, debris, scale, visibility limits)
QA/QC to Reduce Misidentification
Implement a practical review model.
- Second-pass review for a defined percentage of inspections or for all “high-severity” calls
- Discrepancy resolution (tie-break reviewer or supervisor)
- Calibration checks (distance counter accuracy, lighting consistency, lens cleanliness)
- Evidence requirements (no high-severity rating without clear visuals and/or verification measurement)
Training and Continuous Improvement
- Train crews and reviewers on code definitions, common misreads, and consistent severity scoring.
- Use periodic “defect review sessions” where teams compare calls and align interpretations.
- Track repeat issues across cycles to spot systemic problems (design, O&M practices, or recurring root causes).
Long-Term Pipeline Integrity Management Strategies
Accurate defect calls matter most when they drive a repeatable, long-term plan—not just one-off repairs. Strong programs use inspection results to set inspection frequency, forecast rehab needs, and verify that completed work is actually reducing risk over time.
Key strategies include:
- Risk-based inspection cycles: Reinspect high-risk segments more often (history of infiltration, structural distress, recurring blockages) and extend cycles where conditions are stable.
- Closed-loop maintenance: After cleaning, repairs, or rehab, reinspect targeted areas to confirm defects were resolved and ratings improved.
- Performance tracking: Monitor a few consistent metrics (repeat-defect rate, infiltration hot spots, blockage recurrence, response time) to guide priorities.
- Cross-team alignment: Keep inspectors, engineers, and maintenance crews using the same severity thresholds and decision rules so findings translate into action quickly.
With a consistent process in place, organizations can swiftly adapt to emerging industry practices.
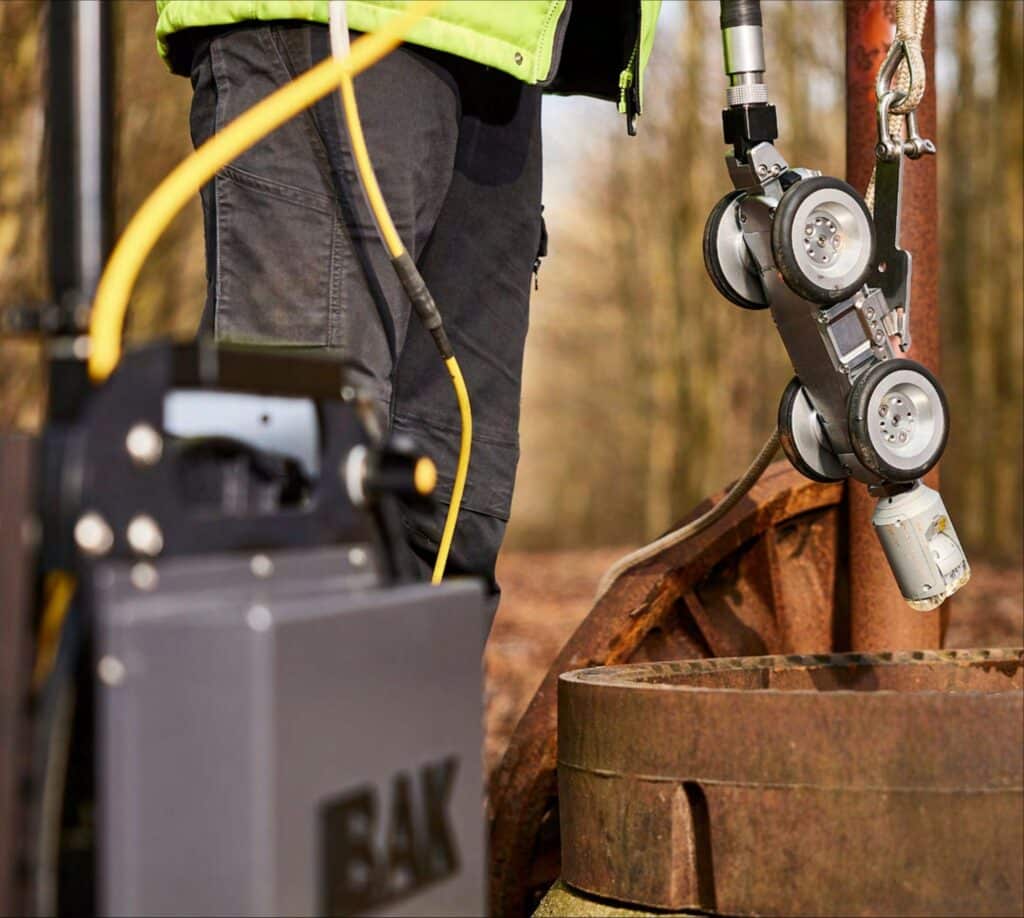
Brown Equipment Company: A Reliable Partner for Pipeline Inspection
Brown Equipment Company helps municipal, commercial, and industrial teams improve pipeline defect detection and documentation with inspection-focused solutions.
- Camera inspection systems: New and used mainline and lateral systems, including custom camera vehicles
- Inspection support: After-sales support and training to help crews capture clear, consistent defect evidence
- Related equipment: Sewer jetters to improve visibility before CCTV and support more accurate inspections
Whether you’re documenting cracks, joint issues, infiltration, or blockages, the right inspection setup helps turn footage into actionable maintenance decisions.
Watch the video below to learn about our commitment to quality and customer satisfaction, and see firsthand why Brown Equipment Company is the trusted partner for professionals across industries.
Transforming Inspection Insights into Actionable Maintenance
Accurate detection and documentation of pipeline defects form the cornerstone of proactive maintenance. By following a structured inspection workflow, employing advanced diagnostic tools, and maintaining detailed records, teams can transform raw data into targeted repair strategies that minimize downtime and extend infrastructure lifespans. Although emerging technologies such as AI, machine learning, and smart pigging continue to advance, ongoing validation and refinement remain essential to fully harness their capabilities.
For organizations seeking to enhance their inspection processes, Brown Equipment Company offers the right mix of technology, training, and support. Contact us today to learn more about our full range of pipeline inspection solutions and let us help you make every inspection count.